Bringing the golf course into your home with a simulator is an exciting venture. To make the most of your initial golf room design consultation, it’s helpful to be well-prepared.
Here's a guide to help you gather all the necessary information and considerations to ensure your consultation goes smoothly and efficiently.
Measuring Your Space
First things first - let’s talk space. Knowing the dimensions and potential obstacles in your designated area is essential.
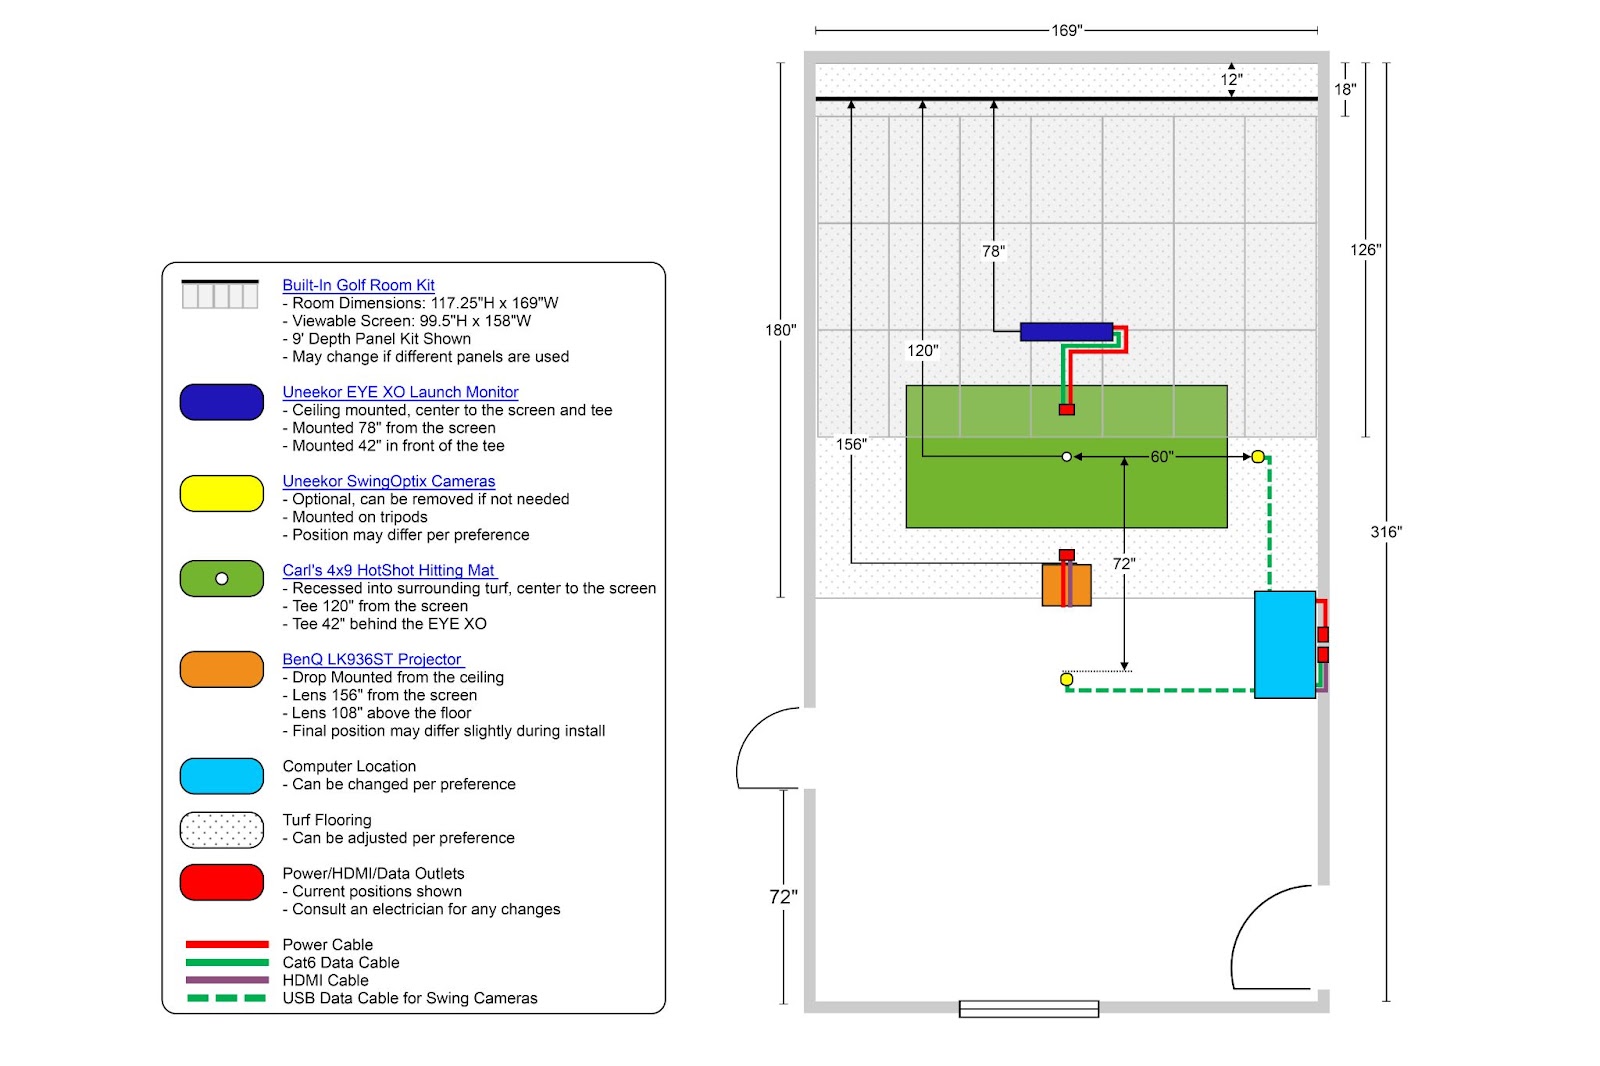
Measure or confirm all interior finished dimensions
To confirm accurate suggestions and design plans, it’s important that we know the finished dimensions of your space. If you’re in the build phase, your building plans may show exterior dimensions; please confirm the interior dimensions with your contractor before moving to the consultation process.
If you need help determining those dimensions, our experts on the design team can help but still need to know what or where changes can be made.
Also, keep in mind measurements of the following room features:
-
Windows: Natural light is great, but not when it causes glare on your screen or washes out your projected image. Measure window placements and consider blackout solutions.
-
Soffits: Low-hanging soffits can play a factor in your home golf simulator setup. Be sure to have ceiling height measurements at different points.
-
Doors/Closets: These can encroach on your simulator space. Make note of their locations and opening directions.
-
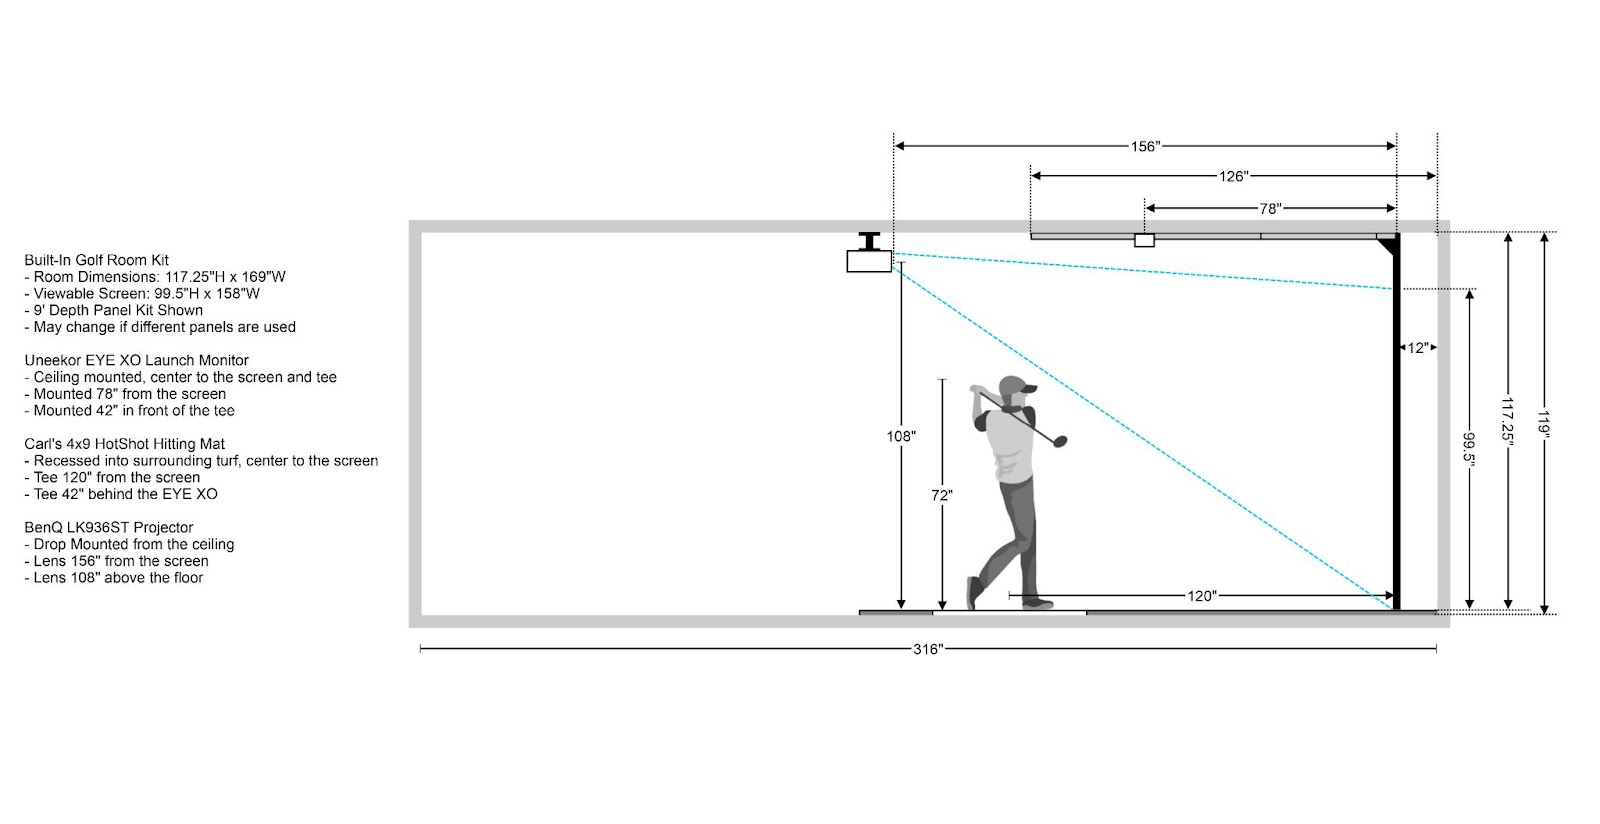
Hitting Area: Test your tee position centered in the room and around 11 feet from the wall where the screen will be positioned. Be prepared to discuss the position and any accommodations that need to be considered, such as a tee that is 12 inches off-center to the right. This situation would occur when the room is not wide enough to accommodate a central hitting area.
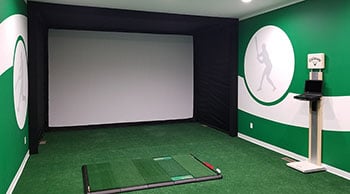
Take and share photos of your space
While you’re getting your measurements, take a few photos of the space that can be shared with the Carl’s Place team. That will help the consultants put an image to the space and measurements.

Projector Placement
Proper projector placement is one of the most difficult parts of setting up a golf simulator, and is crucial for an immersive experience. Therefore, we highly recommend going through these top considerations for projectors.
Before your consultation or purchase of a golf simulator projector, think about:
-
Placement: Typically, we recommend mounting the to the ceiling above or just slightly behind the hitting area. In most setups, this will require a short throw projector. Although not ideal, mounting a projector on the ground in front of the hitting area is also an option.
-
Shadowing: Ensure the projector position avoids casting shadows on the screen. This is why we suggest using a short throw projector that is mounted either right above the tee area or within a few feet behind the tee. As the distance between tee and projector increases, so does the potential for shadowing on the impact screen.
-
Vertical Offset: Although some projector companies are starting to make projectors specifically designed for golf simulators, most projectors are made for home theaters, conference rooms, etc., which means they come with a vertical offset so that the image is projected up from the surface it is placed on. This can cause some challenges when mounting your projector. Ideally, you’ll want as small of a vertical offset as possible.
-
Manual Lens Shift: Some projectors offer lens shift to adjust the image without moving the unit. This can be crucially important in mounting flexibility with your projector.
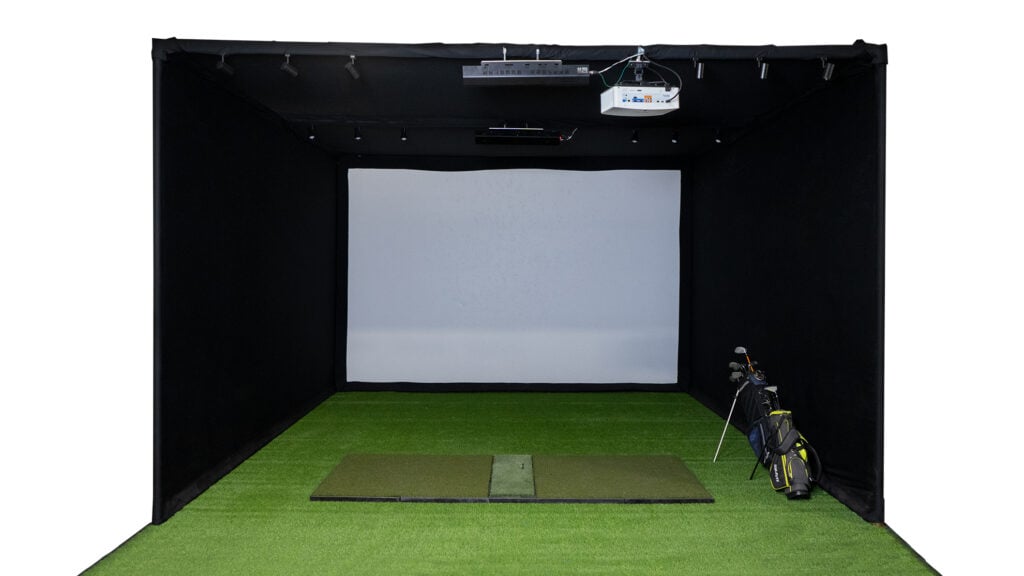
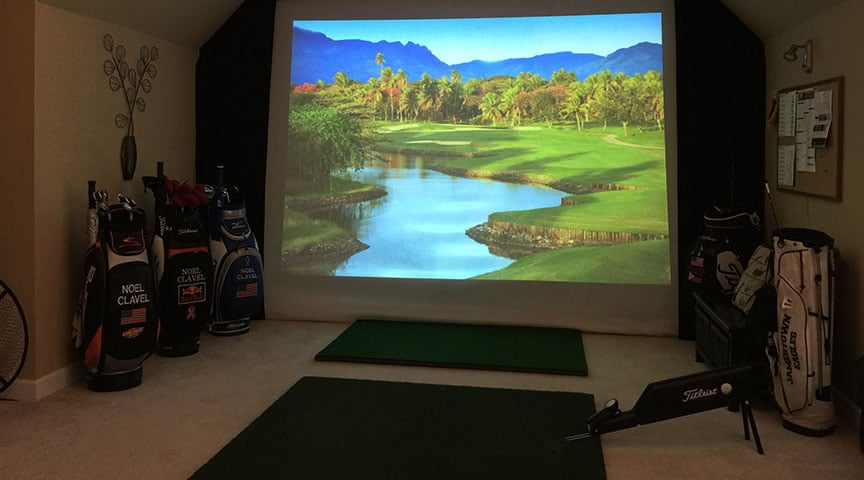
Consider Golf Room Options: Built-In vs. Enclosure
Once you have a clear understanding of your space, it’s time to decide on the simulator setup.
-
Built-In: This is meant for rooms with straight, even 2x4 wood framed walls and integrates seamlessly into your room. Ideal for those looking for a permanent, aesthetic solution. This requires more handy skills and patience than an enclosure.
-
Enclosure: A more flexible option, often easier to install and adjust and can be set almost anywhere. Great for temporary setups or if you plan to move it.
-
Inspiration: Did you have any inspiration or reference photos for what kind of setup you’re interested in? Have those ready to share those with our team, too!
Understand Launch Monitor Placement
Choosing the right spot for your launch monitor can make a world of difference.
-
Floor or Ceiling: Decide if you want the monitor on the floor (easier installation) or mounted on the ceiling (slightly more difficult installation, but saves floor space).
-
Hitting Offset: If your setup requires hitting off-center, the monitor placement will need adjusting to accurately capture your data.
 Software Selection
Your choice of software can enhance your virtual golfing experience. Be prepared to discuss:
- Features: Simulation software varies in features like course variety, accuracy, and game modes.
- Compatibility: Ensure the software works seamlessly with your chosen launch monitor and other equipment.
Choosing a Hitting Mat
The hitting mat is an important piece of the pie. Keep these factors in mind:
-
Durability: High-quality mats last longer and provide a more realistic feel.
-
Size: Ensure the mat fits comfortably within your designated space. Remember that if your space is narrow, you might have to hit off-set, so plan your hitting mat around that offset hitting location.
Additional Accessories
Want to enhance your simulator setup with accessories? Think about whether you want to include any of the following in your indoor golf room:
-
Swing Cameras: Perfect for analyzing your swing in detail.
-
Mounts: Ensure you have appropriate mounts for projectors, monitors, and cameras.
-
Device Requirements: You’ll need a device to run your golf simulator electronics. Some setups can run off tablets, but most need a PC. Confirm your PC meets the software and launch monitor’s technical specifications.
-
Enclosure/Built-In Accessories: Think about add-ons like protective netting or custom built-in features.
Wrapping Up
By coming prepared with this information, you’ll streamline your golf simulator design consultation, ensuring every detail is accounted for.
Did you measure your space?
Do you have an idea where you can mount your projector?
Do you know what type of simulator you want to build?
Have you thought about your hitting location and whether you’ll need to hit centered or offset?
This preparation not only saves time but also helps you and your consultant focus on creating the perfect setup tailored to your needs. Whether it's avoiding potential obstacles, choosing the right equipment, or deciding on the ideal layout, having all the necessary information at your fingertips ensures a smoother, more efficient process.
Ultimately, this leads to a golf simulator that meets your expectations and enhances your playing experience. Happy golfing and enjoy your perfect indoor setup!
Search articles by tag:
How-To DIY Golf Enclosures Golf Simulators Resources PRO Golf Enclosures Golf EnclosuresRelated Posts
Golf Simulators, Resources, PRO Golf Enclosures, Projectors, Launch Monitors
Considering a Crossbar for your Golf Simulator Design?
Golf Impact Screens, Golf Simulators, Projectors, Golf Enclosures, Launch Monitors, Hitting Mats, Software
The Ultimate Golf Room Checklist
How-To, Golf Impact Screens, Resources
How to Build a Brag-Worthy Golf Simulator